Wildwood Plaid Blanket
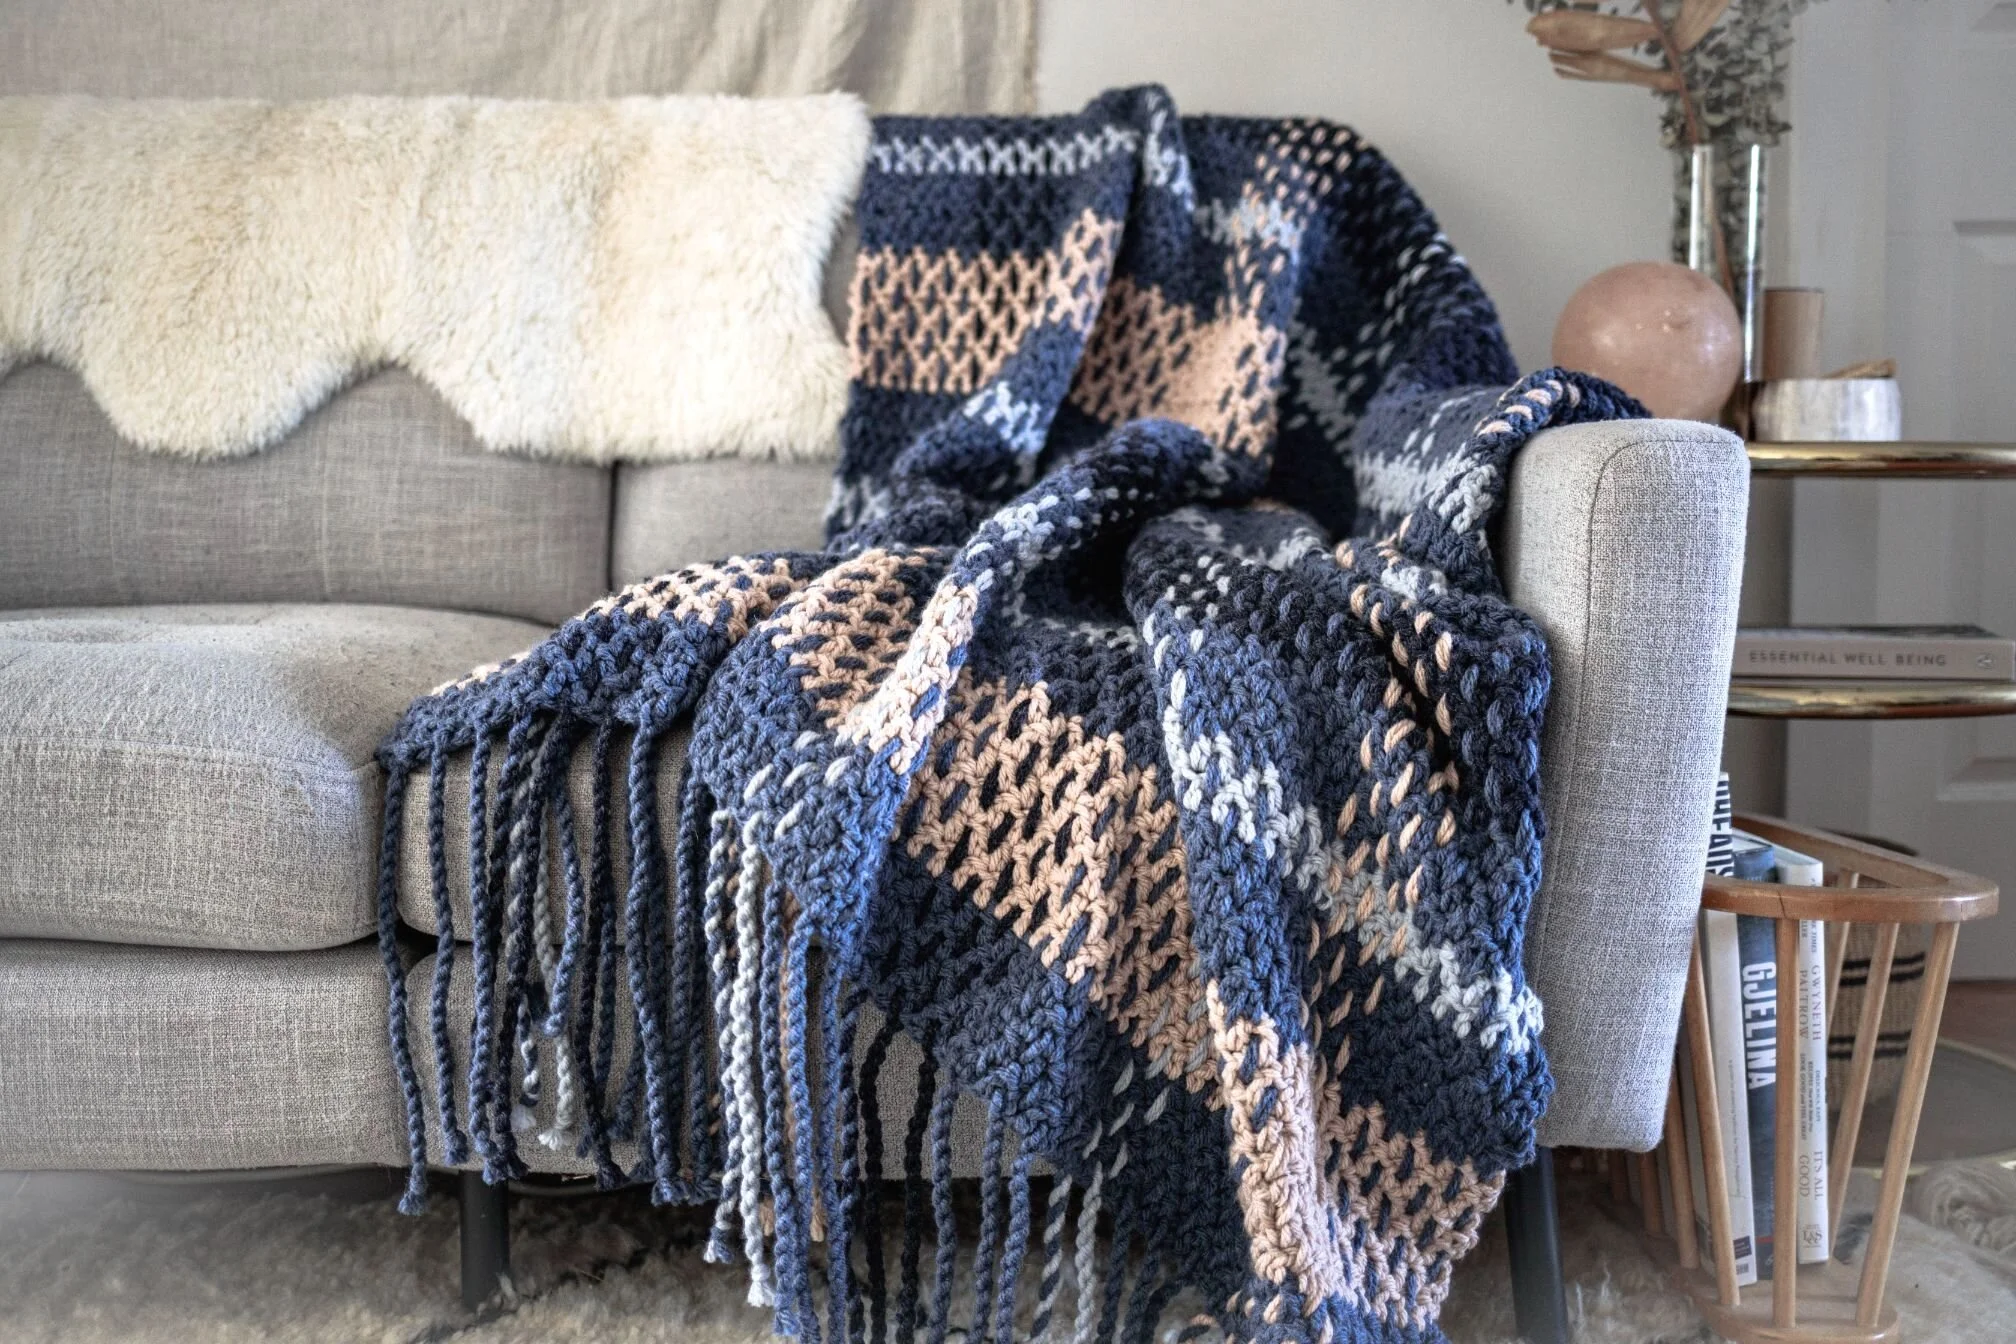
Is there any better project than a big cozy blanket in the middle of February? I think not. I've been craving simple, meditative projects lately to keep me grounded and entertained, and blankets tend to be my go-to when I'm in that mood. Enter the Wildwood Plaid Blanket, a mesmerizing new throw that gives you the "one more row" feeling and major, major satisfaction. Scroll down for the free pattern, click here for the purchasable printer-friendly PDF, or click here for the full kit!
If you've been following me for a while you may remember the Rosebridge Plaid Blanket Scarf I released right around this time last year. I guess late winter gives me plaid vibes, haha. While that accessory was worked up in Lion Brand ReTweed, I re-engineered the technique for my beloved Hue + Me for this full blanket edition.
To be honest I've been wanting to make this throw since I first launched Hue + Me. I got so many requests for a full blanket version of the Rosebridge Plaid Blanket Scarf that I knew it needed to happen eventually, and given the speedy chunky nature of Hue + Me, it only made perfect sense to use it for this project.
The best part about Hue + Me, other than the chunky squishy goodness, is the color palette - 18 shades that all mix and match with each other, so you can never go wrong with any color combo! With this world of possibilities at your fingertips, it is so easy to customize the Wildwood Plaid Blanket for any home decor or whip up an extra special housewarming gift.
When selecting the palette for the Wildwood Plaid Blanket, I already had blue theme in mind. Choosing all three blues in the palette - Ozone, Magic Hour, and Peacoat - I tossed in the neutral Desert shade to add a bit of contrast. Then it was on to deciding how to arrange the colors. Even with the four shades picked out, there are still quite a few looks possible for the finished blanket depending on which colors you choose for which parts. I sketched out my two final choices and left it up to the instagram gods with a vote in my stories. The option with Magic Hour as the base (color A) ended up winning. Look how different it would have looked if I used Ozone for the base instead!
My favorite type of project is one that looks really epic but it actually super easy to make, and the Wildwood Plaid Blanket 100% fits the bill. Not only is it easy, it's completely beginner friendly! Like, never-even-picked-up-a-hook beginner friendly. The entire blanket uses one stitch, so all you need to know is how to make a foundation chain and work the double crochet. That's it! The pattern below includes video tutorials for how to do the weaving and the fancy twisted rope fringe too.
This is a beginner level crochet pattern and the techniques involved are the double crochet stitch and weaving.
MATERIALS:
7 skeins Lion Brand Hue + Me in Magic Hour (617-108) for Color A
2 skeins Lion Brand Hue + Me in Desert (617-099) for Color B
2 skeins Lion Brand Hue + Me in Ozone (617-105) for Color C
2 skeins Lion Brand Hue + Me in Peacoat (617-110) for Color D
Size US N/P (10mm) crochet hook
Tapestry needle
FINISHED SIZE:
Width: 47”/119.5cm
Length: 52”/132cm
*note that the dimensions will be slightly different before adding the weaving, which stretches the stitches widthwise.
GAUGE:
7.5 sts + 4.5 rows = 4”/10cm in double crochet
ABBREVIATIONS:
*All Two of Wands patterns are written in standard US terms.
Ch - Chain
Dc - Double crochet
Rep - Repeat
St(s) - Stitch(es)
Notes: Blanket is worked flat in back and forth rows. Turn at the end of each row. To change color, work the last yarn over of the last stitch of the previous row with the new color. The ch 3 at the beginning of each row counts as a stitch, so you will skip the first stitch of each row and work the final dc into the turning chain of the previous row. Vertical stripes are woven in after crochet base is complete. Fringe is twisted using a rope technique.
Base
With color A, ch 77.
Row 1: Starting in 4th ch from hook, dc across row. (75 sts with skipped 3 ch counting as a st)
Row 2: Ch 3 (counts as a st), dc across row (last st goes in turning ch from row below).
Rep row 2, changing colors as follows:
Rows 3+4: Color A. (4 rows)
Rows 5-10: Color B. (6 rows)
Rows 11-14: Color A. (4 rows)
Rows 15+16: Color C. (2 rows)
Rows 17-20: Color A. (4 rows)
Rows 21-26: Color D. (6 rows)
Rows 27-30: Color A. (4 rows)
Rows 31+32: Color C. (2 rows)
Rows 33-36: Color A. (4 rows)
Rows 37-42: Color B. (6 rows)
Rows 43-46: Color A. (4 rows)
Rows 47+48: Color C. (2 rows)
Rows 49-52: Color A. (4 rows)
Rows 53-58: Color D. (6 rows)
Rows 59-62: Color A. (4 rows)
Secure and weave in all ends.
Weaving
Long strands are now woven in between the crochet stitches to create the plaid effect.
Cut the following number of 86”/218.5cm lengths of each color: 112 color A, 12 color B, 12 color C, and 12 color D. The best way to do this is to pull the center end out of the ball and hold it together with the outer end so you can cut two lengths at a time.
Thread two strands of color A together onto a tapestry needle. Begin weaving over and under each row in between the first (edge) and second sts along the left side of the blanket. Pull lengths so that they are even at either end of the blanket. Thread a second double strand onto the needle and weave between the 2nd and 3rd stitches of the blanket, this time going under and over opposite rows to create a woven effect. Continue with double strands of each color, following the chart below and weaving under and over opposite rows each time. The best way to do this is to lay the blanket flat on top of a bed so that it is spread out nicely.
Fringe
Trim all strands at each end to the same length, approx. 12”/30.5cm.
Treat each double strand as if it were one. Starting with two leftmost double strands at one end, twist each separately in the same direction that the yarn twists until it buckles easily when you give it a little slack. Then twist the two together in the opposite direction, forming a rope. Knot at the end to secure. Rep across entire end with two double strands at a time. Rep on other end of the blanket. Trim ends for a clean edge.
Purchase the printable, ad-free pattern here.
Purchase the kit from Lion Brand Yarn here.
Don't forget to share your projects made using Two of Wands patterns on Instagram with the hashtag #crewofwands so your post will get featured on my site and you'll be in the running for monthly pattern giveaways!
Check out the #crewofwands community page here.
The patterns and photographs of items on this site are the property of Two of Wands and are for personal, non-commercial use only. These patterns files are protected by US copyright, and you may not distribute or sell them electronically or physically. Small batch sales of finished pieces made from these patterns are permitted, but seller must use their own photographs and credit must be given to Two of Wands as the designer.


