Helios Poncho
If you’re a crocheter you know that there are very few things more satisfying than making a crochet square motif! The small, quick nature of them makes them so gratifying that even if you’re making a large scale project with them, you have lots of little wins along the way that keep you going! That is definitely the case with my latest design - the Helios Poncho. Worked up with a color-changing yarn, you will not be able to stop making these squares as each one is so unique and special. And the finished piece make such a statement that you’ll never want to take it off! You can find the free pattern below, purchase an ad-free, printer-friendly PDF here, or shop the full yarn kit here.
After a year of making only accessories, home decor, and baby projects, it was definitely time for me to dive into a garment design. Although I have very limited time these days thanks to my tiny new boss, I have had a large scale granny square poncho/cardigan/cape type piece on my to-make list for ages and I decided I finally had to take the plunge. I knew it would be time consuming, but with 2 weeks of travel in Europe ahead of me I also knew a project like this would be perfect for toting around on the go because you only need to carry a single skein at a time to work up a few squares here and there rather than carting around the whole project.
The squares of the Helios Poncho aren’t exactly granny squares (since those are technically only made with the crochet granny stitch) but they have essentially the same concept. Each one is worked in the round from the center out, and as you stitch you’ll be mesmerized by the Mandala String color changes. It really gives you the motivation to work one more square, one more square, one more square …
This particular stitch pattern, coupled with the Mandala String color changes, and enhanced even more with the dreamy, ethereal Ballad colorway instantly made me think of sun flares and star bursts, so I named the design for after Helios, the Greek God of the sun. Legend has it that Helios also had a hand in ancient love magic, which I think adds an even better vibe to this piece!
I have always loved creating garments with nothing but squares and rectangles, and often remind beginners that this is even possible. The silhouette/construction of the Helios Poncho is the epitome of this and could not be easier. So once you’ve gotten the hang of the squares, the rest of the project will be smooth sailing. The challenge when designing a garment with square motifs is always the grading. Bodies don’t change shape at the same rate across all parts, but squares do - so you have to figure out how to expand certain dimensions without expanding others.
Due to the nature of this piece, it meant that the width and body circumference could expand at a good rate by adding rounds to each square, but it also meant that the length would expand at the same rate which is not ideal. For this reason I’ve designed the larger two sizes to have one less row of squares at the bottom to keep the length manageable. So you may notice that the length doesn’t incrementally increase as the sizes go up, but this was intentional.
This is an easy level crochet pattern and the techniques involved are double crochet, puff stitches, single crochet, working in the round, working into chain spaces, and seaming.
MATERIALS
9 (11, 11, 12) skeins Lion Brand Mandala String in Ballad (557-216AA)
(super fine, weight 1; 350yds/320m per skein)
Size F/5 (3.75mm) crochet hook
Size C/2 (2.75mm) crochet hook
Tapestry needle
GAUGE
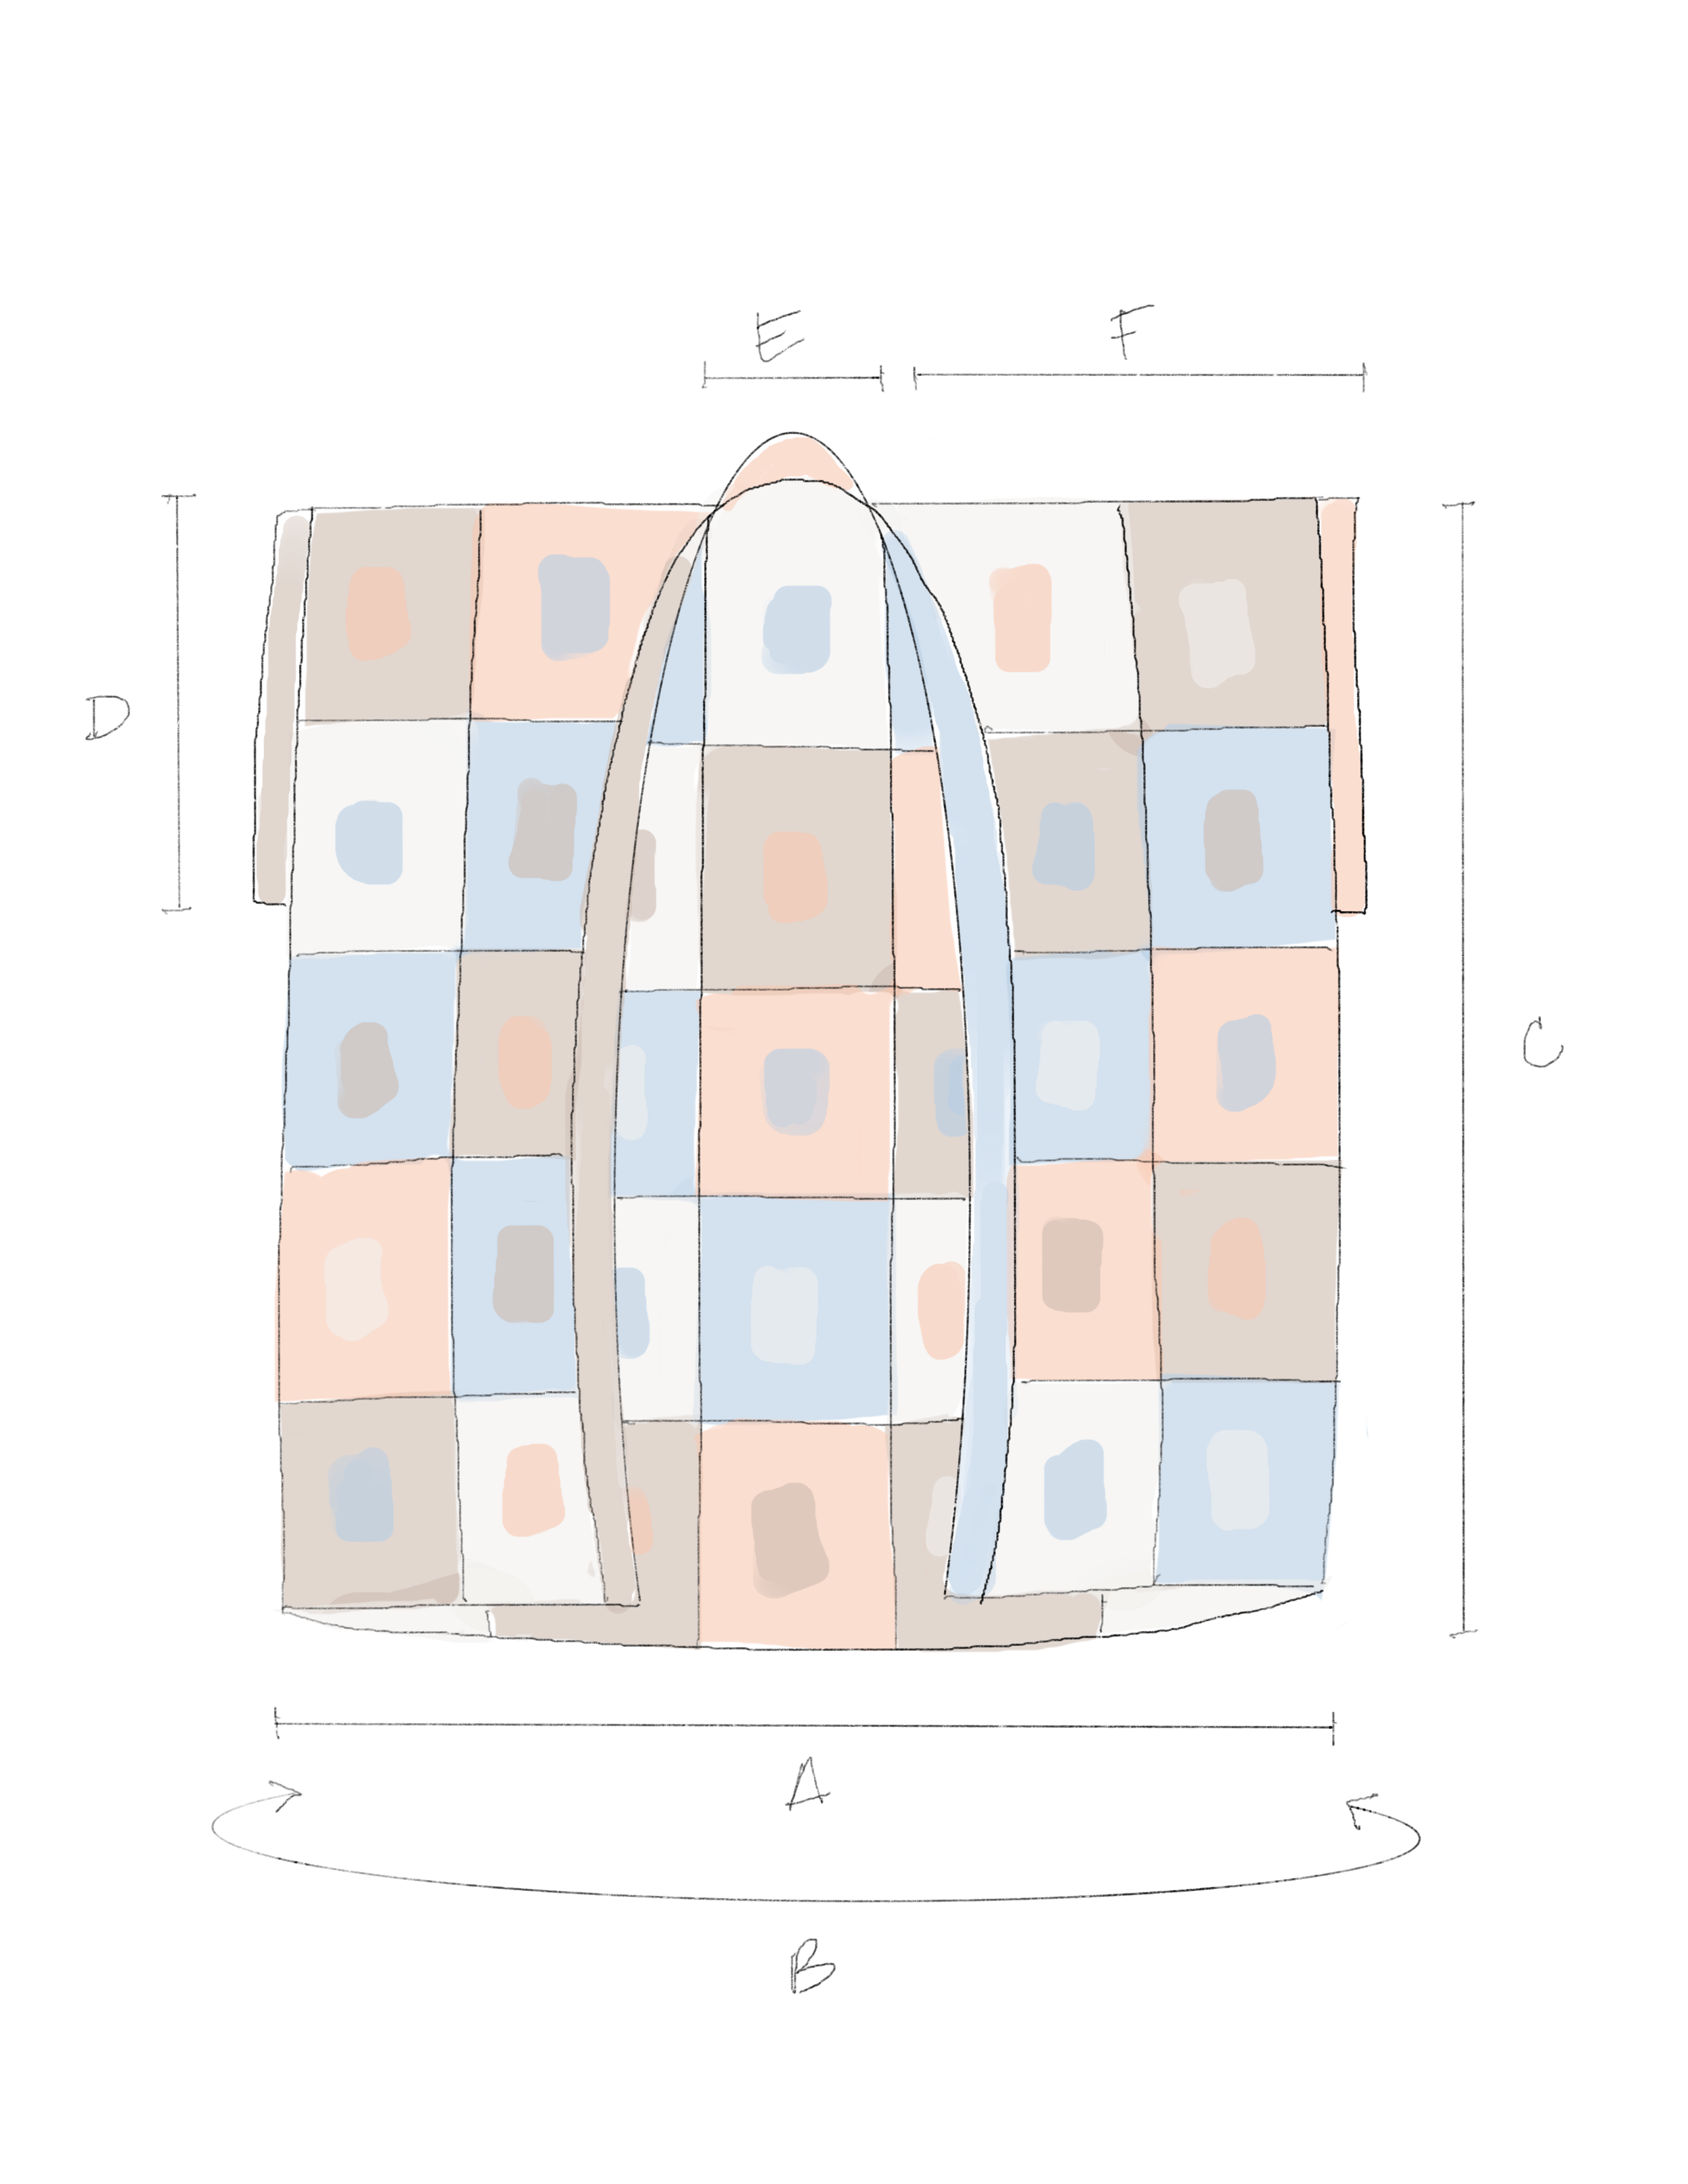
1 square motif = 7 (7.75, 8.5, 9.25)”/18 (20, 21.5, 23.5)cm
FINISHED DIMENSIONS
Sizes: XS/S/M (L/XL, 2XL/3XL, 4XL/5XL)
Suggested positive ease: 30-40”/76-101.5cm
Pictured in size XS/S/M on model with 34”/86.5cm bust
Measurements taken laying flat. Note that fabric has significant drag and expands lengthwise when worn.
ABBREVIATIONS
*All Two of Wands patterns are written in standard US terms.
Ch – chain
Ch-sp – chain space
Dc – double crochet
PS – puff stitch
Rep – repeat
Rnd(s) – round(s)
RS – right side
Sc – single crochet
Sk – skip
Sl st – slip stitch
Sp – space
St(s) – stitch(es)
WS – wrong side
STITCH EXPLANATION:
Puff Stitch (PS) – Yarn over, insert hook into space and draw up a loop (3 loops on hook), yarn over, insert hook into space and draw up a loop (5 loops on hook), yarn over, insert hook into space and draw up a loop (7 loops on hook), yarn over and draw through all loops on hook, ch 1 (this ch 1 will serve as the top of the puff stitch and does not actually count as a ch). Note that an extra ch is created before each PS.
Notes: Squares are worked in the round with the right side facing throughout. Any chain that follows a puff stitch is in addition to the chain 1 that closes the puff stitch. Pattern is written for four sizes: XS/S/M (L/XL, 2XL/3XL, 4XL/5XL). Note that the larger two sizes have one less row of squares at the bottom edge to prevent length from expanding too much. Stitch chart is provided.
SQUARES (make 45 (45, 36, 36)):
With larger hook, begin with a magic loop.
Rnd 1 (RS): Working into the ring, ch 1, PS, ch 2, (PS 2, ch 2) 3 times, PS, sl st to top of 1st PS to join. (8 PS + 4 ch-2 sp)
Rnd 2: Sl st into next corner ch-1 sp, *(PS, ch 2, PS) in corner ch-1 sp, ch 1, dc in sp between next 2 PS, ch 1, rep from * around, sl st to top of 1st PS to join. (2 PS + 1 dc + 2 ch-1 sp per side; 8 PS + 4 dc + 8 ch-1 sp + 4 ch-2 sp total)
Rnd 3: Sl st into next corner ch-1 sp, *(PS, ch 2, PS) in corner ch-1 sp, ch 1, dc in sp after next PS, ch 1, dc in next dc, ch 1, dc in sp before next PS, ch 1, rep from * around, sl st to top of 1st PS to join. (2 PS + 3 dc + 4 ch-1 sp per side; 8 PS + 12 dc + 16 ch-1 sp + 4 ch-2 sp total)
Rnd 4: Sl st into next corner ch-1 sp, *(PS, ch 2, PS) in corner ch-1 sp, ch 1, dc in sp after next PS, (ch 1, dc in next dc) to next PS, ch 1, dc in sp before next PS, ch 1, rep from * around, sl st to top of 1st PS to join. (2 PS + 5 dc + 6 ch-1 sp per side; 8 PS + 20 dc + 24 ch-1 sp + 4 ch-2 sp total)
Rnds 5-10 (11, 12, 13): Rep rnd 4, 6 more times. (2 PS + 17 (19, 21, 23) dc + 18 (20, 22, 24) ch-1 sp per side; 8 PS + 68 (76, 84, 92) dc + 72 (80, 88 , 96) ch-1 sp + 4 ch-2 sp total)
Fasten off, leaving a(n) 18 (19, 20, 21)”/45.75 (48.25, 50.75, 53.5)cm tail for seaming.
CONSTRUCTION:
Lightly block all squares to 7 (7.75, 8.5, 9.25)”/18 (20, 21.5, 23.5)cm to ensure a perfect fit. Seam the squares together using the fastened off tails in the configuration illustrated below as follows:
Thread the tail of one square on to a tapestry needle. With two squares laying next to each other and the tail threaded onto the needle at the bottom right corner of the left square, insert the needle up through the ch-2 sp at the bottom left corner of the right square, then up through the ch-2 sp at the bottom right corner of the left square. Insert the needle up through the next ch-1 sp along the left edge of the right square, then up through the next ch-1 sp along the right edge of the left square. Continue in the manner, zigzagging back and forth up through the ch-1 sp until you reach the top of the sides. Pull gently to “zip” up the seam every inch or so, and be sure not to tighten too much so that puckering does not occur. Finish by inserting the needle up the through the ch-2 at the top right corner of the left square, then up through the ch-2 at the top right corner of the left square.
For the back, seam 5 rows of 5 (5, 4, 4) squares together in the above manner, then seam the rows together using separate lengths of yarn.
5 squares seamed into a row
Row seaming for XS/S/M and L/XL sizes
Row seaming for sizes 2XL/3XL and 4XL/5XL
For the fronts, seam 2 rows of 5 (5, 4, 4) squares together in the above manner, then seam the rows together using separate lengths of yarn.
5 squares seamed into a row for sizes XS/S/M and L/XL
4 squares seamed into a row for sizes 2XL/3XL and 4XL/5XL
Row seaming for sizes XS/S/M and L/XL
Row seaming for sizes 2XL/3XL and 4XL/5XL
Rotate the fronts so they are vertical and seam to the outer 2 squares along the top of the back to form the shoulders. The square remaining in the middle forms the back neck.
With work folded at the shoulders, seam the sides from the bottom up using the same seaming method, leaving 10.5 (11, 11.5, 12)”/26.5 (28, 29, 30.5)cm for armholes.
BOTTOM EDGING:
With RS facing and smaller hook, join yarn at bottom left center front corner.
Row 1 (RS): Ch 1, dc in each ch-2 sp, PS, ch-1 sp, and dc across bottom edge, turn.
Row 2 (WS): Ch 1, dc across, turn.
Row 3: Ch 1, dc across, do not turn. Rotate work to begin collar band.
COLLAR BAND:
Row 1 (RS): Ch 1, 2 dc in the side of each of the 3 dc rows of the bottom edge, dc in each ch-2 sp, PS, ch-1 sp, and dc up right center front edge, dc in each ch-2 sp, PS, ch-1 sp, and dc across back neck, dc in each ch-2 sp, PS, ch-1 sp, and dc down left center front edge, turn.
Row 2 (WS): Ch 1, dc across row, turn.
Row 3: Ch 1, dc across row.
Fasten off.
SLEEVES:
With RS facing and smaller hook, join yarn at underarm.
Rnd 1 (RS): Ch 1, dc in each ch-2 sp, PS, ch-1 sp, and dc around armhole, sl st to 1st dc to join, turn.
Rnd 2 (WS): Ch 1, dc around, sl st to 1st dc to join, turn.
Rnd 3: Ch 1, dc around, sl st to 1st dc to join.
Secure and weave in all ends.
Purchase the printable, ad-free pattern here.
Purchase the kit from Lion Brand here.
Don't forget to share your projects made using Two of Wands patterns on Instagram with the hashtag #crewofwands to get featured on my page and be in the running for monthly pattern giveaways!
Join the Crew of Wands Facebook group to connect with other makers of Two of Wands patterns for help with techniques and pattern related questions.
The patterns and photographs of items on this site are the property of Two of Wands and are for personal, non-commercial use only. These patterns files are protected by US copyright, and you may not distribute or sell them electronically or physically. Small batch sales of finished pieces made from these patterns are permitted, but seller must use their own photographs and credit must be given to Two of Wands as the designer.


